Why you want a Green Screen for Zoom Backgrounds
- Wes Simpson

- May 30, 2020
- 3 min read
Updated: Jun 6, 2020
It's pretty easy to insert a custom background in Zoom - just click on on the "^" next to the video camera icon, and select "Choose Virtual Background." The result looks pretty good, but the image will look noticeably better if you can rustle up a green screen:

In the picture above, the two top row images show screen captures of the a Zoom video window without the Virtual Background feature enabled. The bottom row shows what happens when that feature is turned on.
As you can see, the both of the images with the virtual background look pretty good around my head and shoulders, but the one on the left (without the green screen) is having a real issue with correctly processing the background between my fingers. Here is a full size shot that may be easier to view:

Notice that some of my fingers are missing sections (ouch!) and some of the background is bleeding through. In the area where my thumb approaches my head also has some extra background. (If you are really eagle-eyed, you might also notice that part of my right ear is missing below my earbud and there is a little extra background right near where my arm crosses in front of my shirt).
Why are these artifacts happening? Well, the software in Zoom is trying to do a chroma-key, where the pixels are sorted into two groups - foreground pixels and background pixels, based in part on their color (chroma). Foreground pixels and preserved in the final video, and background pixels are replaced with the virtual background. If you look at the image below, you can see that there are a lot of places where there isn't a sharp difference between the foreground and the background:

It's pretty amazing that Zoom can do as good a job as it does. With less sophisticated software that used just a simple color slicing mechanism, there would be lots more artifacts, and the image of my shirt would probably look terrible.
For comparison, here is a larger version of the virtual background image made when using a green screen in the background:

Much better results overall, because the software has a significantly easier time separating the foreground from the background when the pixel colors are so different.
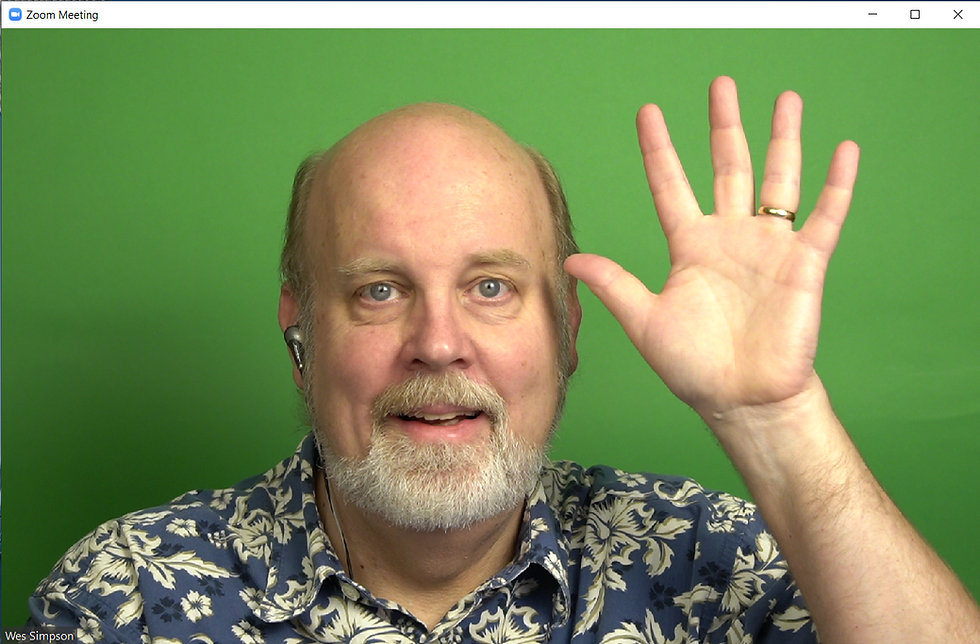
Here's what the green screen setup looks like feeding into the virtual background:

To get the benefits of a green screen, it's not necessary to spend a large amount of money. If you take a look on the web, you might find that some green screens are out of stock or back-ordered, and that some of the available ones are pretty pricey. I purchased a roll of Savage Tech Green paper from B&H Photo and it is working fine, as you can see. My friend Paul Turner (who actually knows what he is doing with this stuff, having designed color keyers in his previous role at Grass Valley) tells me that this paper has a little too much red in it, and that I should think about how to get more light onto the background, but for now, the results look pretty good to me.
As luck would have it, I just happen to have a green shirt that is about the right color for a green screen, and when I put it on I think the result is pretty funny:

Here it is without the virtual background:

So that brings me to my last point: be careful when using the green screen mode to make sure that you don't have any places in your image that are the same color as your background.
Overall, I would have to say the Zoom software is pretty good at Virtual Backgrounds. Use a green screen (or basically any other solid color that isn't in your foreground image) and see how much of a difference it makes. #zoom #bhphoto #colorkey #greenscreen


Great info! Would you know what would be the reason why, when using a green screen with zoom, my (white) face fluctuates from normal skin tones, to pinkish then back to normal at times.
Thank you for showing the difference between an actual green screen and the virtual one. The photos really help me understand the change in quality!
awesome details i was not understanding the purpose of green screen